
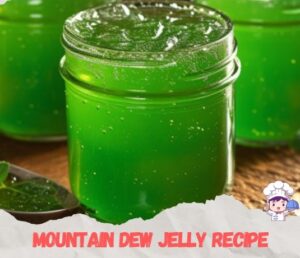
Homemade Mountain Dew Jelly: A Burst of Citrus Sunshine in a Jar
Mountain Dew Jelly is an unexpectedly delightful treat that brings the zesty, effervescent flavors of Mountain Dew soda into a sweet, spreadable form. Perfect for a fun breakfast, a unique gift, or simply to brighten up your pantry, this jelly is sure to become a favorite. Its vibrant green color and tangy sweetness capture the essence of carefree summer days and the joy of indulging in something playful and delicious.
Ingredient Overview
Mountain Dew Soda: This iconic soda provides the citrusy base for our jelly, with its unique blend of lemon and lime flavors. It adds a refreshing tang and a vibrant, slightly fizzy character to the jelly.
Granulated Sugar: Essential for sweetness and the jelly’s preservation, sugar also helps to achieve the proper consistency.
Powdered Fruit Pectin: This natural thickening agent is crucial for transforming our liquid mixture into a gel-like consistency. It’s derived from fruits and is key to getting that perfect jelly texture.
Green Food Coloring (Optional): If you want your jelly to mimic the vibrant green hue of Mountain Dew, a few drops of food coloring will do the trick. This is purely for aesthetic appeal and can be omitted if you prefer a more natural look.
Step-by-Step Cooking Instructions
1. Sterilize Your Canning Jars and Lids
Sterilizing your jars and lids ensures that your jelly will stay fresh and safe to eat. Place them in a large pot of boiling water for at least 10 minutes, then let them dry on a clean towel.
2. Combine Mountain Dew and Pectin
In a large saucepan, pour in the Mountain Dew soda and add the powdered fruit pectin. Stir the mixture continuously until the pectin is fully dissolved.
3. Bring to a Boil
Turn the heat to high and bring the mixture to a rolling boil. Make sure to stir constantly to prevent sticking and to ensure an even consistency.
4. Add Sugar
Once boiling, add all the granulated sugar at once. Stir the mixture until the sugar is completely dissolved.
5. Boil Hard for 1 Minute
Return the mixture to a rolling boil and let it boil hard for exactly one minute. Continue stirring constantly to avoid burning and to maintain an even texture.
6. Remove from Heat and Skim Foam
After the hard boil, remove the saucepan from the heat. Use a metal spoon to skim off any foam that has formed on the surface.
7. Add Food Coloring (Optional)
If you wish to enhance the color, add a few drops of green food coloring to achieve your desired shade. Stir well to distribute the color evenly.
8. Fill the Jars
Carefully ladle the hot jelly into your sterilized jars, leaving about 1/4 inch of headspace at the top. This allows for expansion during processing.
9. Wipe and Seal Jars
Wipe the rims of the jars with a clean, damp cloth to remove any residue. Place the sterilized lids on top and screw on the bands until they are fingertip-tight.
10. Process in Boiling Water Bath
Place the filled jars in a boiling water bath for 10 minutes. Adjust the processing time based on your altitude if necessary. This step is crucial for sealing the jars and ensuring the jelly’s shelf stability.
11. Cool and Check Seals
Remove the jars from the water bath and let them cool completely on a towel-lined countertop. After 24 hours, check the seals by pressing down on the center of each lid. If it doesn’t flex, the jar is sealed correctly.
12. Store and Enjoy
Store your sealed jars in a cool, dark place. Properly processed jelly can last up to a year. Enjoy your homemade Mountain Dew jelly on toast, biscuits, or as a fun addition to desserts!
Frequently Asked Questions (FAQs)
1. Can I use diet Mountain Dew for this recipe?
Yes, you can use diet Mountain Dew, but the texture and flavor may be slightly different due to the lack of sugar.
2. Is it necessary to add food coloring?
No, the food coloring is optional and is only used to achieve the characteristic green color of Mountain Dew.
3. How do I know if my jars are sealed properly?
After 24 hours, press down on the center of each lid. If it does not flex, the jar is sealed properly.
4. Can I reduce the amount of sugar?
Reducing the sugar may affect the setting of the jelly and its preservation. It’s best to stick to the recipe for best results.
5. What if my jelly doesn’t set?
If your jelly doesn’t set, you can reprocess it by adding more pectin and bringing it back to a boil.
6. How should I store the jelly once opened?
Once opened, store the jelly in the refrigerator and consume it within a few weeks.
7. Can I use liquid pectin instead of powdered?
Yes, but you will need to adjust the quantity according to the package instructions for liquid pectin.
8. Is there a substitute for pectin?
You can use lemon juice as a natural pectin substitute, but results may vary.
9. Can I use other sodas?
Yes, you can experiment with other sodas for different flavors. Adjust the sugar accordingly.
10. Why do I need to sterilize the jars?
Sterilizing the jars prevents contamination and ensures your jelly stays fresh and safe to eat.
11. How do I adjust the boiling time for altitude?
For every 1,000 feet above sea level, add one minute to the boiling time.
12. Can I double the recipe?
It’s best to make jelly in smaller batches to ensure even cooking and proper setting.
13. What can I do with the leftover foam?
The foam is safe to eat and can be used as a topping for toast or desserts.
14. How long does the jelly need to set?
Jelly usually sets within 24-48 hours.
15. Can I freeze the jelly?
Yes, you can freeze the jelly, but it may alter the texture slightly.
16. What if my jelly is too thick?
If your jelly is too thick, you can reheat it and add a bit more liquid to achieve the desired consistency.
17. How can I make the jelly spicier?
You can add a bit of jalapeño or other spicy ingredients during the cooking process.
18. Can I add fruit pieces to the jelly?
Yes, but ensure the fruit is finely chopped and fully cooked to avoid affecting the texture.
19. How long will the jelly last if unopened?
Unopened and properly processed jelly can last up to a year.
20. Can I use honey instead of sugar?
Honey can be used, but it will alter the flavor and texture of the jelly.
Helpful Tips
1. Use Fresh Soda: Make sure your Mountain Dew soda is freshly opened to retain its fizz and flavor.
2. Constant Stirring: Stir the mixture constantly to prevent sticking and ensure an even texture.
3. Accurate Measuring: Measure the sugar and pectin accurately for the best results.
4. Avoid Overcooking: Overcooking can result in a thicker, more caramelized jelly.
5. Use a Timer: Timing is crucial, especially during the hard boil phase.
6. Clean Jars: Ensure your jars are completely clean and sterilized to avoid contamination.
7. Avoid Air Bubbles: When ladling the jelly into jars, avoid introducing air bubbles for better sealing.
8. Check Seals: Always check the seals after 24 hours to ensure they are properly sealed.
9. Use a Funnel: A canning funnel can help you pour the jelly into jars without spilling.
10. Store Properly: Store the sealed jars in a cool, dark place to maintain their quality.
11. Label Your Jars: Always label your jars with the date to keep track of their shelf life.
12. Experiment with Flavors: Feel free to experiment with different sodas for unique jelly flavors.
13. Taste Test: Always taste your mixture before the final boil to adjust sweetness if necessary.
14. Use Quality Pectin: High-quality pectin ensures better results.
15. Monitor Temperature: Use a candy thermometer to monitor the temperature for precise results.
16. Skim Foam Efficiently: Skim foam off promptly to ensure a smooth jelly.
17. Use Sterile Equipment: Ensure all your equipment is sterile to avoid contamination.
18. Adjust for Altitude: Adjust your boiling time based on your altitude for proper processing.
19. Be Patient: Give the jelly enough time to set properly before checking the consistency.
20. Enjoy the Process: Enjoy the process and the satisfaction of making your own jelly!
Storage Tips
- Store unopened jars in a cool, dark place.
- Once opened, keep the jelly in the refrigerator.
- Use within a year for the best quality.
- Keep away from direct sunlight.
- Ensure jars are sealed properly before storage.
- Avoid storing in damp areas to prevent mold.
- Label jars with the date of canning.
- Check seals periodically.
- Store in a single layer to avoid crushing.
- Use airtight containers if transferring to new jars.
Recipe Secrets
- Fresh Soda: Always use fresh Mountain Dew for the best flavor.
- Proper Pectin: Ensure your pectin is not expired for effective setting.
- Balance Sugar: Balancing the sugar is key to achieving the perfect consistency and sweetness.
- Quick Boil: A rapid, hard boil ensures the jelly sets properly.
- Skim Foam: Skimming foam gives the jelly a clearer, more appealing look.
- Timing: Precise timing during the boiling phase is crucial.
- Sterile Jars: Sterilizing jars properly prevents contamination.
- Headspace: Leaving the right amount of headspace ensures proper sealing.
- Boiling Bath: The boiling water bath is essential for long-term preservation.
- Altitude Adjustments: Adjust processing time based on your altitude for accurate results.
- Coloring: Food coloring is optional but adds to the visual appeal.
- Storage: Proper storage extends the jelly’s shelf life.
- Taste Test: Adjust sweetness to your preference before the final boil.
- Natural Pectin: You can use natural pectin like apple or lemon if preferred.
- Fruit Add-ins: Add finely chopped fruit for a twist.
- Spice it Up: Add spices or herbs for unique flavors.
- Consistent Stirring: Stir constantly to prevent burning.
- Quality Sugar: Use high-quality granulated sugar.
- Precise Measurements: Accurate measurements ensure consistency.
- Enjoy the Process: Enjoy the process and the rewarding outcome of homemade jelly!
Conclusion
Creating your own Mountain Dew jelly is a fun and rewarding experience, perfect for adding a unique twist to your breakfast or gifting to friends and family. With this detailed guide, you’re equipped with everything you need to make the perfect batch of jelly. Happy canning!