
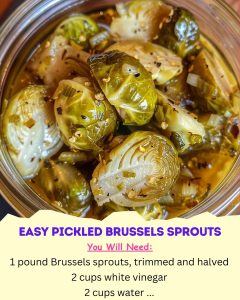
Easy Pickled Brussels Sprouts
Description
Imagine the crunch of fresh Brussels sprouts infused with a tangy, slightly sweet brine, perfect for snacking or enhancing your favorite dishes. These Easy Pickled Brussels Sprouts are a delightful addition to your culinary repertoire. The calming process of pickling not only preserves these vibrant green gems but also transforms them into a versatile treat. Whether you’re a pickling pro or a curious beginner, this recipe is sure to bring joy and satisfaction to your kitchen adventures.
Ingredients Overview
- Brussels Sprouts (1 pound, trimmed and halved): Choose fresh, firm Brussels sprouts for the best texture. Trimming and halving them ensures they absorb the brine evenly.
- White Vinegar (2 cups): Provides the essential tang for the pickling process.
- Water (2 cups): Dilutes the vinegar, balancing the acidity.
- Salt (3 tablespoons): Enhances flavor and helps preserve the sprouts.
- Sugar (3 tablespoons): Adds a subtle sweetness that complements the tanginess.
- Garlic (4 cloves, peeled and smashed): Infuses a robust flavor into the brine.
- Whole Black Peppercorns (2 teaspoons): Adds a hint of spice and depth.
- Mustard Seeds (2 teaspoons): Brings a subtle warmth and complexity.
- Dried Bay Leaves (2): Imparts a mild, earthy flavor.
- Optional: Red Pepper Flakes: For those who enjoy a spicy kick, these flakes add a delightful heat.
Step-by-Step Cooking Instructions
Step 1: Prepare the Brine
In a large saucepan, combine the vinegar, water, salt, and sugar. Bring the mixture to a boil over medium-high heat, stirring occasionally until the salt and sugar dissolve completely. This forms the flavorful foundation for your pickles.
Step 2: Add Aromatics
Once the brine is boiling, add the smashed garlic cloves, black peppercorns, mustard seeds, bay leaves, and optional red pepper flakes. Stir to combine, allowing these aromatics to release their flavors into the brine.
Step 3: Blanch the Brussels Sprouts
Gently add the halved Brussels sprouts to the boiling brine. Let them cook for about 2-3 minutes, just until they start to soften slightly but still retain their crunch. Be careful not to overcook them, as they will continue to soften slightly while pickling.
Step 4: Cool the Mixture
Remove the saucepan from the heat and allow the Brussels sprouts and brine mixture to cool to room temperature. This step is crucial for the sprouts to absorb the flavors without becoming too soft.
Step 5: Jar the Sprouts
Once cooled, transfer the Brussels sprouts and the brine mixture to clean jars or containers, making sure the Brussels sprouts are fully submerged in the liquid. This ensures even pickling and flavor distribution.
Step 6: Refrigerate
Seal the jars tightly with lids and store them in the refrigerator for at least 24 hours to allow the flavors to develop. The pickled Brussels sprouts will keep in the refrigerator for up to 2 weeks, providing a delicious, ready-to-eat snack or ingredient.
Step 7: Serve and Enjoy
Serve the pickled Brussels sprouts as a tasty snack, or use them to add a tangy kick to salads, sandwiches, or cheese platters. Their vibrant flavor and satisfying crunch are sure to delight your taste buds.
Tips for a Seamless Cooking Experience
Tip 1: Use Fresh Ingredients
For the best results, use the freshest Brussels sprouts you can find. Fresh ingredients ensure a crisp texture and vibrant flavor.
Tip 2: Sterilize Your Jars
To extend the shelf life and ensure safety, make sure your jars are thoroughly cleaned and sterilized before use.
Tip 3: Customize the Spice Level
Feel free to adjust the amount of red pepper flakes according to your heat preference. You can also experiment with other spices like coriander seeds or dill for a unique twist.
Storage and Reheating Tips
Storage: Keep the pickled Brussels sprouts in the refrigerator. They will stay fresh and flavorful for up to 2 weeks. Always use a clean utensil to remove the sprouts from the jar to maintain their quality.
Reheating: These pickled sprouts are best enjoyed cold or at room temperature. If you prefer them warm, gently heat them in a saucepan over low heat for a few minutes, but be careful not to cook them further.
Frequently Asked Questions
How can I ensure my pickles stay crunchy?
To maintain a crunchy texture, make sure not to overcook the Brussels sprouts during the blanching step. Quickly cooling them in the brine also helps preserve their crunch.
Can I use a different type of vinegar?
Yes, you can experiment with other vinegars like apple cider vinegar or rice vinegar for a different flavor profile. However, these may slightly alter the taste.
Is it necessary to add sugar?
While sugar balances the acidity and adds depth to the flavor, you can reduce the amount or use a sugar substitute if you prefer a less sweet pickle.
What other vegetables can I pickle using this brine?
This brine recipe is versatile and works well with other vegetables like cucumbers, carrots, and cauliflower. Adjust the blanching time based on the vegetable’s texture.
Can I reuse the brine for another batch?
For the best flavor and safety, it’s recommended to make a fresh brine for each batch. Reusing brine can result in weaker flavor and potential contamination.
Secrets for Culinary Perfection
Secret 1: Quality Ingredients
Starting with the highest quality ingredients makes a significant difference. Fresh Brussels sprouts and premium spices will yield the best results.
Secret 2: Patience
Allowing the pickled Brussels sprouts to rest for at least 24 hours ensures the flavors meld beautifully. Patience is key to achieving that perfect balance of taste and texture.
Secret 3: Experimentation
Don’t be afraid to tweak the recipe. Adding fresh herbs like dill or tarragon can add a delightful twist. Pickling is an art, and experimenting will help you discover your unique flavor preferences.
Enjoy the process and savor the delicious results of your homemade pickled Brussels sprouts!