
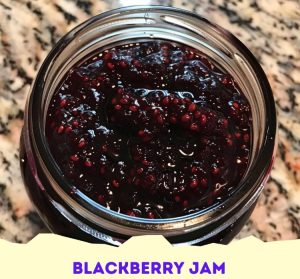
Homemade Blackberry Jam: A Delightful Taste of Summer
There’s something utterly magical about the process of making your own jam. The vibrant burst of blackberries, the aromatic hint of lemon, and the warm, comforting bubbling of fruit on the stove create an experience that is both soothing and rewarding. Today, we’re diving into a timeless classic – Blackberry Jam. This recipe is a perfect way to capture the essence of summer, providing you with a sweet treat that can be enjoyed year-round. Whether you’re spreading it on toast, dolloping it on yogurt, or using it as a filling for baked goods, this homemade blackberry jam is sure to become a staple in your kitchen.
Ingredients Overview
- Blackberries (4 cups): Fresh, plump blackberries are the star of this jam. Their natural sweetness and tartness make for a perfect balance. Be sure to select ripe berries for the best flavor.
- Granulated Sugar (2 cups): Sugar not only sweetens the jam but also acts as a preservative. The amount can be adjusted slightly to taste, but keep in mind that sugar helps the jam set.
- Lemon Juice (2 tablespoons): The acidity of lemon juice helps balance the sweetness and enhances the natural pectin in the berries, aiding in the thickening process.
- Lemon Zest (1 teaspoon, optional): Adding lemon zest is optional but highly recommended. It imparts a fresh, citrusy aroma that elevates the overall flavor of the jam.
Step-by-Step Cooking Instructions
Step 1: Prepare the Blackberries
Rinse the blackberries thoroughly under cool running water. Carefully remove any stems, leaves, or debris. Pat the berries dry with a paper towel.
Step 2: Combine Ingredients in Pot
In a large, heavy-bottomed pot, combine the blackberries, granulated sugar, lemon juice, and lemon zest (if using). Stir gently to mix.
Step 3: Bring to a Boil
Place the pot over medium heat. Stir occasionally to prevent the sugar from sticking to the bottom and burning. Bring the mixture to a gentle boil. The blackberries will start to release their juices, creating a rich, purple syrup.
Step 4: Simmer the Jam
Once boiling, reduce the heat to low. Let the mixture simmer for about 30-40 minutes, stirring occasionally. As it simmers, the jam will thicken.
Step 5: Test for Doneness
To check if the jam is ready, place a small amount on a chilled plate and tilt the plate. If the jam wrinkles slightly and doesn’t run, it’s done. If it’s too runny, continue simmering and test again after a few minutes.
Step 6: Cool the Jam
Once the jam has reached your desired consistency, remove the pot from heat. Let it cool slightly for about 5-10 minutes. This cooling period helps the jam set further.
Step 7: Transfer to Jars
Carefully ladle the warm jam into clean, sterilized jars, leaving a little space at the top for expansion. Wipe the rims of the jars with a damp cloth to remove any residue before sealing.
Step 8: Seal and Store
Seal the jars tightly and let the jam cool completely at room temperature. Once cooled, store the jars in the refrigerator.
Step 9: Enjoy!
Enjoy your homemade blackberry jam on toast, biscuits, or as a topping for yogurt and desserts!
Valuable Tips for a Seamless Cooking Experience
Tip: Use a Heavy-Bottomed Pot
A heavy-bottomed pot distributes heat more evenly, reducing the risk of burning your jam.
Tip: Stir Occasionally
Stirring occasionally prevents the sugar from sticking to the pot and ensures even cooking.
Tip: Use a Candy Thermometer
For precision, use a candy thermometer. The jam is ready when it reaches 220°F (104°C).
Tip: Chill Your Plate
Before starting, place a plate in the freezer. This will help in accurately testing the jam’s readiness.
Storage and Reheating Tips
Storage:
Store your sealed jars of blackberry jam in the refrigerator for up to three weeks. For longer storage, consider canning your jam using a water bath method for shelf stability.
Reheating:
If your jam becomes too firm in the refrigerator, gently reheat it in a microwave-safe container or on the stove over low heat. Stir occasionally until it reaches a spreadable consistency.
Frequently Asked Questions (FAQs)
1. How long does homemade blackberry jam last?
Homemade blackberry jam can last up to one year if properly sealed and stored in a cool, dark place. Once opened, it should be refrigerated and consumed within 1-2 months.
2. Can I use frozen blackberries for this recipe?
Yes, frozen blackberries can be used. Thaw them completely and drain excess liquid before using them in the recipe.
3. What if my jam doesn’t set?
If your jam doesn’t set, you can cook it a little longer. If it still doesn’t set, you can add more lemon juice or commercial pectin and cook again.
4. How do I know when the jam is ready?
The jam is ready when it reaches 220°F (104°C) or passes the wrinkle test: place a small amount on a chilled plate and push it with your finger; if it wrinkles, it’s done.
5. Can I reduce the amount of sugar?
You can reduce the sugar, but it might affect the jam’s consistency and shelf life. Consider using low-sugar pectin if you prefer less sugar.
6. Is it necessary to sterilize jars?
Yes, sterilizing jars is crucial to prevent bacterial growth and ensure the jam is preserved safely.
7. Can I add other fruits to the blackberry jam?
Absolutely! Mixing blackberries with other fruits like raspberries or blueberries can create unique flavor combinations.
8. What is the purpose of lemon juice in the recipe?
Lemon juice adds acidity, which balances the sweetness and helps in the gelling process by activating the natural pectin in the fruit.
9. Can I make jam without pectin?
Yes, this recipe doesn’t require added pectin. The natural pectin in blackberries and lemon juice is sufficient to set the jam.
10. How do I fix overcooked jam?
If your jam is overcooked and too thick, you can gently reheat it with a bit of water to reach the desired consistency.
11. What’s the best way to mash the blackberries?
You can use a potato masher, fork, or even a blender to mash the blackberries to your desired texture.
12. Can I use honey instead of sugar?
Honey can be used, but it will alter the flavor and consistency. It’s also sweeter than sugar, so use it sparingly.
13. Why did my jam turn out grainy?
Grainy jam can result from undissolved sugar. Make sure to dissolve the sugar completely while cooking.
14. How can I make seedless blackberry jam?
To make seedless jam, strain the mashed blackberries through a fine mesh sieve or cheesecloth before cooking.
15. Can I use this jam as a cake filling?
Yes, this jam makes an excellent cake filling, but you might want to thicken it slightly with cornstarch if it’s too runny.
16. Do I need to refrigerate the jam after opening?
Yes, once opened, the jam should be refrigerated to maintain freshness and prevent spoilage.
17. How can I enhance the flavor of my blackberry jam?
Adding spices like cinnamon or vanilla can enhance the flavor of the jam. Adjust the quantity to your taste.
18. Can I double the recipe?
Yes, you can double the recipe, but it may take longer to cook. Ensure even heating to avoid burning.
19. What if my jam is too sweet?
If the jam is too sweet, add a little more lemon juice to balance the sweetness.
20. Can I use this recipe for canning?
Yes, this recipe is suitable for canning. Follow proper canning procedures to ensure a safe and preserved product.
Helpful Tips
- Select Ripe Berries: Use fully ripe blackberries for the best flavor and natural sweetness.
- Sterilize Your Jars: Always sterilize jars before use to ensure the jam stays fresh and safe to eat.
- Use a Heavy-Bottomed Pot: This helps distribute heat evenly and prevents the jam from burning.
- Skim the Foam: Skimming the foam that forms during cooking will result in a clearer jam.
- Test for Doneness: Use the wrinkle test or a candy thermometer to ensure the jam is set.
- Stir Frequently: Stirring prevents the jam from sticking to the pot and burning.
- Add a Little Butter: A small amount of butter can reduce foam formation.
- Avoid Overcooking: Overcooking can make the jam too thick and caramelized.
- Store in a Cool, Dark Place: Proper storage extends the shelf life of your jam.
- Label Your Jars: Include the date and type of jam to keep track of freshness.
- Experiment with Flavors: Add spices or mix in other fruits for a unique twist.
- Use Clean Utensils: Always use clean utensils to avoid contamination.
- Cool Before Storing: Allow jars to cool completely before storing to ensure a proper seal.
- Avoid Reducing Sugar Too Much: Sugar helps in setting and preserving the jam.
- Monitor the Temperature: Keep an eye on the temperature to avoid overcooking.
- Check Jar Seals: Ensure the lids pop down and are sealed properly after cooling.
- Make Small Batches: Smaller batches are easier to manage and cook evenly.
- Use Fresh Lemon Juice: Freshly squeezed lemon juice enhances the flavor better than bottled.
- Freeze for Longer Storage: If you don’t plan to use it soon, freezing is an excellent option.
- Keep a Jam Journal: Note down your modifications and results for future reference.
Secrets to Perfect Blackberry Jam
- Use the Freshest Ingredients: The fresher the blackberries, the better the jam.
- Balance Sugar and Acidity: Proper balance is key to a good set and taste.
- Natural Pectin: Blackberries have natural pectin; you often don’t need additional pectin.
- Simmer Slowly: Slow simmering helps to develop flavors without burning.
- Patience is Key: Don’t rush the process; give the jam time to set properly.
- Proper Jar Sealing: Ensuring jars are sealed correctly prevents spoilage.
- Cool Down Time: Allow the jam to cool slightly before filling jars to avoid cracking.
- Avoid Metal Bowls: Metal can react with the acidity; use glass or plastic bowls.
- Taste Test: Regularly taste the jam while cooking to adjust flavors.
- Seasonal Variations: Blackberries’ natural sweetness varies; adjust sugar accordingly.
- Gel Test: Use a gel test (plate test) to check if the jam is set.
- Avoid Water Bath Canning for Soft Set: Soft set jams might need a pressure canner.
- Don’t Overmix: Overmixing can break down the fruit too much.
- Watch for Burn Signs: Keep a close watch to prevent burning, especially towards the end.
- Use Fresh Zest: Fresh lemon zest adds a burst of flavor.
- Avoid Commercial Pectin: Rely on natural pectin for a more authentic taste.
- Use a Wide Pot: A wider pot helps in quicker evaporation.
- Check for Clear Jam: Skim off impurities for a clearer jam.
- Adjust Consistency: If too thick, adjust with a little water; if too thin, cook longer.
- Consistency Testing: Test the consistency by cooling a small amount on a plate.