
The Ultimate Classic Apple Pie Recipe: A Sweet Father’s Day Tradition That Never Gets Old
There’s something magical about the aroma of a homemade apple pie wafting through the kitchen – it’s like a warm hug that wraps around your entire home. As Father’s Day approaches, I can’t help but think about the countless memories created around family tables, where love was measured not just in words, but in the golden, flaky crust of a perfectly baked apple pie.
This classic apple pie recipe isn’t just a dessert; it’s a love letter to tradition, a bridge between generations, and quite possibly the most comforting thing you can pull from your oven. My grandmother always said that the secret to a great apple pie lies not just in the ingredients, but in the intention behind it. When you’re rolling out that dough with thoughts of the people you love, somehow the pie just tastes better.
What makes this recipe truly special is its simplicity and affordability – for just $9, you can create 8 generous servings of pure happiness. It’s proof that the most meaningful gestures don’t require expensive ingredients, just a loving heart and a willingness to create something beautiful from scratch.
Ingredient Overview
Let me walk you through each component that makes this apple pie absolutely divine:
Fresh Apples (6-7 medium apples – $4): The heart and soul of our pie. I recommend a mix of Granny Smith and Honeycrisp apples – the Granny Smiths provide that perfect tart bite that won’t get mushy during baking, while the Honeycrisp adds natural sweetness and a lovely texture contrast.
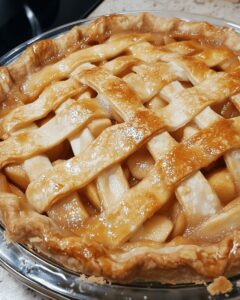
Pie Crust ($3): Whether you’re using store-bought or making from scratch, this foundation carries all our beautiful flavors. Look for a crust that’s golden in color and has a slightly buttery aroma – these are signs of quality.
Granulated Sugar: The sweet symphony that balances the natural tartness of apples. We’ll use just enough to enhance, not overpower, the fruit’s natural flavors.
Ground Cinnamon: This warm spice is what transforms simple apples into something magical. It adds depth, comfort, and that unmistakable apple pie aroma we all crave.
Butter: Those little dots of butter scattered throughout will melt during baking, creating pockets of richness and helping to create that perfect, glossy filling.
Step-by-Step Cooking Instructions
Step 1: Prepare Your Apples Peel, core, and slice your apples into thin, even pieces – about ¼ inch thick. This ensures even cooking and prevents some pieces from being mushy while others remain too firm. As you work, place the sliced apples in a large bowl to prevent browning.
Step 2: Create the Filling In your bowl of sliced apples, add ¾ cup of granulated sugar and 1 teaspoon of ground cinnamon. Gently toss everything together until each apple slice is beautifully coated. The sugar will start to draw out the natural juices, creating the beginnings of our luscious filling.
Step 3: Prepare the Pie Dish Roll out your bottom pie crust and carefully line a 9-inch pie dish. Let the edges hang over slightly – we’ll trim and crimp them later. This overhang is crucial for creating those beautiful, sealed edges.
Step 4: Fill with Love Arrange your seasoned apple mixture in the prepared crust, mounding it slightly in the center. The apples will cook down, so don’t worry about it looking too full. Dot the surface with small pieces of butter – about 2 tablespoons total.
Step 5: Top and Seal Place your second crust over the filling. Trim any excess dough, leaving about ½ inch overhang. Fold the top crust under the bottom crust edge and crimp decoratively. Cut several small slits in the top crust to allow steam to escape.
Step 6: Bake to Perfection Preheat your oven to 375°F. Place the pie on the center rack and bake for 50-60 minutes, until the crust is golden brown and you can see the filling bubbling through the vents. If the edges brown too quickly, cover them with strips of aluminum foil.
Step 7: Cool and Serve Let the pie cool for at least 2 hours before slicing. This cooling time allows the filling to set properly, ensuring clean, beautiful slices that hold their shape.
Frequently Asked Questions
1. Can I use different types of apples for this pie? Absolutely! While I recommend Granny Smith and Honeycrisp, you can use Braeburn, Northern Spy, or Jonathan apples. Avoid Red Delicious or Gala as they become too soft during baking.
2. How do I prevent my bottom crust from getting soggy? Pre-bake the bottom crust for 10 minutes before adding the filling, or brush it with beaten egg white before adding apples. You can also sprinkle a thin layer of breadcrumbs or crushed graham crackers on the bottom.
3. Can I make this pie ahead of time? Yes! You can assemble the pie completely and refrigerate it overnight before baking, or bake it completely and store it covered at room temperature for up to 2 days.
4. Why is my pie filling runny? This usually happens when apples release too much juice. Try adding 2 tablespoons of cornstarch or tapioca to your apple mixture, and make sure to let the pie cool completely before cutting.
5. How do I know when my pie is done? The crust should be golden brown, and you should see bubbling through the vents. The internal temperature should reach 175°F if you want to be precise.
6. Can I freeze this apple pie? Yes! You can freeze it baked or unbaked. Wrap tightly in plastic wrap and aluminum foil. Frozen pies keep for up to 4 months.
7. What’s the best way to reheat leftover pie? Reheat individual slices in a 350°F oven for 10-15 minutes, or microwave for 30-60 seconds. Avoid reheating the whole pie unless serving immediately.
8. Can I use a store-bought crust? Absolutely! Store-bought crusts work wonderfully and save time. Look for all-butter crusts for the best flavor, or try the refrigerated roll-out crusts for convenience.
9. How much sugar should I use if my apples are very sweet? Reduce the sugar to ½ cup if using very sweet apples like Fuji or Gala. Taste your apple mixture and adjust accordingly.
10. What can I substitute for cinnamon? Try apple pie spice, nutmeg, or a combination of cinnamon, nutmeg, and allspice for a more complex flavor profile.
11. How thick should I slice my apples? Aim for ¼ inch thick slices. This ensures even cooking – thicker pieces may remain hard while thinner ones turn to mush.
12. Can I add other ingredients to the filling? Absolutely! Try adding ½ cup of cranberries, a handful of chopped walnuts, or a tablespoon of lemon juice for extra flavor dimensions.
13. Why did my crust shrink during baking? This happens when the dough is overworked or too warm. Always chill your dough before rolling, and don’t stretch it when placing in the pan.
14. How do I prevent the edges from burning? Cover the pie edges with aluminum foil strips about halfway through baking, or use a pie crust shield designed specifically for this purpose.
15. Can I make mini apple pies instead? Yes! Use muffin tins or small pie pans. Reduce baking time to 25-30 minutes and watch carefully for doneness.
16. What’s the secret to a flaky crust? Keep your ingredients cold, don’t overwork the dough, and use a combination of butter and shortening for the perfect texture.
17. How do I get a shiny, golden top crust? Brush the top crust with beaten egg or milk before baking. This creates a beautiful, bakery-style finish.
18. Can I use frozen apples? Fresh apples work best, but if using frozen, thaw and drain them first. You may need to add extra thickener as frozen apples release more liquid.
19. What if I don’t have enough apples? You can mix apples with pears for a delicious variation, or add some firm pear slices to stretch your apple filling.
20. How do I store leftover pie? Cover and store at room temperature for 2 days, or refrigerate for up to 5 days. For longer storage, wrap and freeze for up to 4 months.
20 Helpful Tips for Apple Pie Success
1. Choose the Right Apple Variety Mix tart and sweet apples for the best flavor balance. Granny Smith provides structure while Honeycrisp adds natural sweetness.
2. Slice Apples Uniformly Consistent ¼-inch slices ensure even cooking and prevent some pieces from being mushy while others remain firm.
3. Prevent Apple Browning Toss sliced apples with a little lemon juice if you’re not using them immediately to prevent oxidation and browning.
4. Pre-cook Your Filling For extra-thick filling, sauté your seasoned apples for 5 minutes before adding to the crust. This removes excess moisture.
5. Use a Glass Pie Dish Glass conducts heat evenly and allows you to see the bottom crust browning, ensuring it’s fully cooked.
6. Create Steam Vents Cut decorative slits or use small cookie cutters to create vents in your top crust – this prevents a soggy top and creates beautiful presentation.
7. Brush with Egg Wash Beat one egg with a tablespoon of milk and brush over the top crust for a golden, bakery-style finish.
8. Protect the Edges Cover pie edges with foil strips if they brown too quickly, typically after 30-40 minutes of baking.
9. Use a Pie Bird A ceramic pie bird placed in the center supports the top crust and creates a natural steam vent while preventing overflow.
10. Test for Doneness Insert a knife through a vent – if it goes through apples easily and comes out hot, your pie is done.
11. Cool Completely Resist the urge to cut immediately. Let the pie cool for at least 2 hours to allow the filling to set properly.
12. Add Texture with Nuts Sprinkle chopped walnuts or pecans over the apples before adding the top crust for extra crunch and flavor.
13. Enhance with Extracts A teaspoon of vanilla extract or ½ teaspoon of almond extract in the filling adds depth to the flavor profile.
14. Create a Streusel Top Instead of a top crust, try a crumbly streusel topping made with flour, butter, brown sugar, and oats.
15. Use Parchment Paper Line your baking sheet with parchment and place the pie on it to catch any drips and make cleanup easier.
16. Adjust Sweetness Taste your apple mixture before baking and adjust sugar based on the natural sweetness of your apples.
17. Add Spice Variations Experiment with cardamom, ginger, or apple pie spice blend for unique flavor profiles that complement the apples.
18. Create Decorative Tops Use cookie cutters to create leaf shapes from excess dough, then arrange on top for a beautiful, rustic presentation.
19. Prevent Soggy Bottoms Bake on the lowest oven rack for the first 25 minutes to ensure the bottom crust gets properly browned and crisp.
20. Serve at the Right Temperature Apple pie is delicious warm, at room temperature, or even slightly chilled – each temperature brings out different flavor notes.
10 Storage and Reheating Tips
1. Room Temperature Storage Store baked apple pie covered with foil or plastic wrap at room temperature for up to 2 days. The crust stays crispier this way.
2. Refrigerator Storage For longer storage, refrigerate covered pie for up to 5 days. Bring to room temperature before serving or reheat as desired.
3. Freezing Baked Pie Wrap cooled pie tightly in plastic wrap, then aluminum foil. Freeze for up to 4 months. Thaw overnight in refrigerator before serving.
4. Freezing Unbaked Pie Assemble pie completely, wrap tightly, and freeze for up to 3 months. Bake directly from frozen, adding 15-20 minutes to baking time.
5. Individual Slice Storage Wrap individual slices in plastic wrap and store in refrigerator for quick grab-and-go servings throughout the week.
6. Reheating Whole Pie Reheat refrigerated pie in a 350°F oven for 15-20 minutes, covering edges with foil to prevent over-browning.
7. Reheating Individual Slices Microwave slices for 30-60 seconds, or reheat in a 350°F oven for 10 minutes for crispier crust.
8. Preventing Sogginess Place a paper towel under pie slices when microwaving to absorb excess moisture and maintain crust texture.
9. Reviving Day-Old Pie Brush the crust lightly with melted butter and warm in a 300°F oven for 10 minutes to restore crispness.
10. Freezing Pie Slices Individually wrap slices and freeze for up to 2 months. Perfect for single servings when you’re craving homemade pie.
20 Recipe Secrets for the Perfect Apple Pie
1. The Two-Apple Rule Always use at least two different apple varieties – one tart (Granny Smith) and one sweet (Honeycrisp) for complex flavor.
2. Salt in the Filling Add a pinch of salt to your apple mixture to enhance all the flavors and balance the sweetness perfectly.
3. Vodka in the Crust Replace some of the water in homemade crust with vodka – it evaporates during baking, leaving an incredibly flaky texture.
4. Brown Butter Magic Brown your butter before dotting it over the apples for a nutty, caramelized flavor that elevates the entire pie.
5. The Cornstarch Secret Mix 2 tablespoons of cornstarch with your sugar and cinnamon to create a filling that’s never runny.
6. Lemon Juice Balance Add 1 tablespoon of fresh lemon juice to brighten the flavors and prevent the apples from browning.
7. The Sugar Resting Technique Toss sliced apples with sugar and let sit for 30 minutes before baking – this draws out juices for better flavor concentration.
8. Blind Baking Bottom Pre-bake your bottom crust for 10 minutes with pie weights to ensure it’s never soggy.
9. The Tapioca Trick Use instant tapioca instead of cornstarch for a clearer, more jewel-like filling that’s perfectly thickened.
10. Freeze the Assembled Pie Freeze your assembled pie for 30 minutes before baking – this helps maintain the crust’s shape and prevents shrinking.
11. Apple Juice Reduction Reduce ½ cup of apple juice to 2 tablespoons and add to filling for concentrated apple flavor without extra liquid.
12. The Cheddar Secret A thin slice of sharp cheddar under the top crust adds a subtle savory note that complements the sweet apples beautifully.
13. Boiled Cider Addition Add 2 tablespoons of boiled cider (concentrated apple juice) for intense apple flavor without extra moisture.
14. The Butter Dot Technique Cut butter into small, uniform pieces and distribute evenly – this ensures consistent richness throughout every bite.
15. Double Vanilla Power Use both vanilla extract in the filling and vanilla sugar in place of regular sugar for deeper flavor.
16. The Cardamom Surprise Add ¼ teaspoon of ground cardamom to your spice mixture for an unexpected, sophisticated flavor note.
17. Cream Cheese Enhancement Blend 4 oz of softened cream cheese into your apple mixture for an incredibly creamy, rich filling.
18. The Honey Touch Replace ¼ of your sugar with honey for complex sweetness and a beautiful golden color.
19. Crystallized Ginger Finely chop 2 tablespoons of crystallized ginger and fold into apples for a warm, spicy kick.
20. The Perfect Crimp Use a fork dipped in flour to crimp edges – this creates a decorative seal that won’t stick to your utensil.
Nutritional Benefits
This classic apple pie isn’t just delicious – it’s also packed with the natural goodness of apples! Each serving provides fiber, vitamin C, and antioxidants. The cinnamon adds anti-inflammatory properties, while the moderate sugar content makes this a reasonable treat when enjoyed as part of a balanced diet.
Serving Suggestions
Nothing beats a warm slice of apple pie with a scoop of vanilla ice cream, but don’t limit yourself! Try serving with:
- A dollop of fresh whipped cream
- A drizzle of caramel sauce
- A sprinkle of toasted nuts
- A slice of sharp cheddar cheese (trust me on this one!)
- A cup of coffee or spiced tea
Make It Your Own
The beauty of this classic recipe lies in its versatility. Feel free to experiment with different spice combinations, add your favorite nuts, or incorporate dried fruits like cranberries or raisins. Some families love adding a touch of maple syrup, while others swear by a hint of bourbon in the filling.
Remember, the best apple pie is the one made with love, shared with people who matter, and enjoyed without worrying about perfection. Every pie tells a story, and this one is ready to become part of yours.
Happy baking, and here’s to creating sweet memories that will last a lifetime!