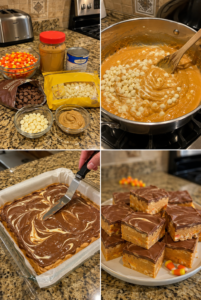
If you’re looking for an easy candy-style dessert that is creamy, crunchy, sweet, and packed with peanut-buttery chocolate flavor, this Butterfinger Fudge is the perfect treat to make.
Made with chocolate chips, sweetened condensed milk, butter, vanilla, and crushed Butterfinger candy bars, this fudge is rich, smooth, and loaded with crispy candy pieces in every bite. It has the soft texture of classic homemade fudge with the crunchy, flaky sweetness of Butterfinger mixed throughout.
This recipe is perfect for holiday dessert trays, Christmas candy boxes, bake sales, birthday parties, movie nights, potlucks, game day sweets, or anytime you want a no-bake dessert that feels special but is simple to prepare.
The chocolate fudge base melts together quickly, the Butterfinger pieces add crunch and bold candy flavor, and the finished squares slice beautifully once chilled.
Why You’ll Love This Recipe
Easy no-bake dessert
Creamy chocolate fudge
Crunchy Butterfinger pieces
Perfect for holidays
Great for candy trays
Simple ingredients
Kid-friendly treat
Great for gifting
Sweet and rich
Perfect make-ahead dessert
Fun party recipe
No oven needed
Easy to slice
Chocolate and peanut butter flavor
Always disappears fast
Ingredients You’ll Need
Chocolate chips
Sweetened condensed milk
Butter
Vanilla extract
Butterfinger candy bars, crushed
Salt, optional
Optional Add-Ins
Peanut butter chips
White chocolate drizzle
Caramel drizzle
Chopped peanuts
Mini chocolate chips
Creamy peanut butter
Crushed pretzels
Sea salt flakes
Extra candy bar pieces
Chocolate sprinkles
Marshmallow bits
Toffee bits
Butterscotch chips
Crushed cookies
Holiday sprinkles
How to Make Butterfinger Fudge
Step 1: Prepare the Pan
Line an 8×8-inch baking dish with parchment paper.
Leave a little extra parchment hanging over the sides so you can lift the fudge out easily after it chills.
Lightly grease the parchment if desired.
This helps the fudge release cleanly and makes slicing much easier.
Step 2: Crush the Butterfinger Candy Bars
Place the Butterfinger candy bars in a sealed bag.
Use a rolling pin or the bottom of a cup to crush them into small pieces.
You want a mix of fine crumbs and larger crunchy chunks.
The small pieces blend into the fudge, while the larger pieces give each bite texture.
Step 3: Melt the Chocolate Base
Add chocolate chips, sweetened condensed milk, and butter to a saucepan over low heat.
Stir slowly until the chocolate melts and the mixture becomes smooth.
Keep the heat low so the chocolate does not burn or become grainy.
The sweetened condensed milk helps create that thick, creamy fudge texture.
Step 4: Add Vanilla
Remove the pan from the heat.
Stir in vanilla extract.
Vanilla adds warmth and makes the chocolate flavor taste richer.
You can also add a tiny pinch of salt to balance the sweetness.
Step 5: Fold in Butterfinger Pieces
Add most of the crushed Butterfinger pieces to the fudge mixture.
Gently fold them in until evenly distributed.
Save a handful of crushed candy for topping.
Do not stir too much, or the candy pieces may break down too much into the warm fudge.
Step 6: Spread into the Pan
Pour the fudge mixture into the prepared baking dish.
Use a spatula to spread it evenly into the corners.
Smooth the top as much as possible.
The fudge will be thick, so work gently and spread it while it is still warm.
Step 7: Add the Topping
Sprinkle the reserved crushed Butterfinger pieces over the top.
Press them lightly into the fudge so they stick.
This gives the fudge a pretty candy-topped finish and makes the Butterfinger flavor easy to see.
Step 8: Chill the Fudge
Place the pan in the refrigerator.
Chill for at least 2 hours, or until the fudge is firm.
The fudge needs time to set so it slices cleanly into squares.
For the neatest cuts, chill it fully before slicing.
Step 9: Slice into Squares
Lift the fudge from the pan using the parchment paper.
Place it on a cutting board.
Use a sharp knife to cut it into small squares.
Because this fudge is rich, smaller pieces are perfect.
Step 10: Serve and Enjoy
Serve chilled or at room temperature.
The fudge is creamy, chocolatey, crunchy, and sweet with a delicious candy bar flavor in every bite.
Serving Ideas
Butterfinger Fudge is perfect for:
Christmas candy trays
Holiday dessert boxes
Bake sales
Birthday parties
Movie nights
Potlucks
Game day sweets
Candy boards
Family dessert nights
Party favors
School treats
Weekend baking
Chocolate dessert trays
Homemade candy gifts
Sweet snack plates
What to Serve With It
This fudge pairs perfectly with:
Hot chocolate
Coffee
Milk
Vanilla ice cream
Chocolate ice cream
Peanut butter cookies
Brownies
Sugar cookies
Whipped cream
Caramel sauce
Fresh strawberries
Pretzels
Dessert boards
Holiday cookies
Chocolate drizzle
Frequently Asked Questions
Can I use milk chocolate chips?
Yes. Milk chocolate chips make the fudge sweeter and softer in flavor.
They work well with Butterfinger candy pieces.
Can I use semi-sweet chocolate chips?
Yes. Semi-sweet chocolate chips are a great choice because they balance the sweetness of the candy bars.
Can I add peanut butter?
Yes. You can stir in a few spoonfuls of creamy peanut butter with the chocolate mixture.
This gives the fudge a stronger peanut butter flavor.
Can I make this in the microwave?
Yes. Add chocolate chips, sweetened condensed milk, and butter to a microwave-safe bowl.
Heat in short intervals, stirring between each one, until smooth.
Then stir in vanilla and Butterfinger pieces.
How long does it need to chill?
The fudge should chill for at least 2 hours.
If you want very clean slices, chill it longer until fully firm.
Can I freeze Butterfinger Fudge?
Yes. Freeze the fudge in an airtight container with parchment paper between layers.
Thaw in the refrigerator before serving.
Why is my fudge too soft?
It may need more chilling time.
Make sure you use sweetened condensed milk, not evaporated milk.
Why is my fudge grainy?
The chocolate may have been heated too quickly.
Use low heat and stir gently until smooth.
Can I use other candy bars?
Yes. This base works with many chopped candy bars.
Butterfinger gives the fudge a crispy, peanut-buttery crunch.
Can I make it ahead of time?
Yes. This fudge is perfect for making ahead.
Store it in the refrigerator until ready to serve.
20 Detailed Tips for the Best Butterfinger Fudge
⭐ Line the pan with parchment paper for easy removal.
⭐ Use sweetened condensed milk, not evaporated milk.
⭐ Melt the chocolate over low heat.
⭐ Stir constantly so the chocolate stays smooth.
⭐ Add butter for a richer texture.
⭐ Add vanilla after removing from heat.
⭐ Use a pinch of salt to balance sweetness.
⭐ Crush Butterfinger bars into mixed-size pieces.
⭐ Save some candy pieces for topping.
⭐ Fold candy pieces gently into the fudge.
⭐ Do not overmix after adding the candy.
⭐ Spread the fudge while it is still warm.
⭐ Press toppings lightly so they stick.
⭐ Chill until fully firm before slicing.
⭐ Use a sharp knife for clean squares.
⭐ Wipe the knife between cuts for neater pieces.
⭐ Cut small squares because the fudge is rich.
⭐ Store in the refrigerator for best texture.
⭐ Add peanut butter for extra flavor.
⭐ Make extra for dessert trays and gifts.
Fun Variations
Peanut Butter Butterfinger Fudge
Stir creamy peanut butter into the melted chocolate mixture.
This version has an even stronger peanut butter candy flavor.
White Chocolate Butterfinger Fudge
Use white chocolate chips instead of chocolate chips.
The white chocolate makes the fudge sweeter and shows off the candy pieces beautifully.
Dark Chocolate Butterfinger Fudge
Use dark chocolate chips for a richer flavor.
This version balances the sweet candy crunch with deeper chocolate taste.
Salted Butterfinger Fudge
Sprinkle a little flaky sea salt over the top before chilling.
The salt balances the sweetness and makes the chocolate flavor stand out.
Caramel Butterfinger Fudge
Drizzle caramel sauce over the top before chilling.
This version is gooey, sweet, and perfect for candy lovers.
Pretzel Butterfinger Fudge
Add crushed pretzels with the Butterfinger pieces.
This gives the fudge a sweet and salty crunch.
Storage & Reheating
Store Butterfinger Fudge in an airtight container in the refrigerator for up to 1 week.
Place parchment paper between layers to keep the pieces from sticking together.
You can also store it at room temperature for a shorter time if your kitchen is cool, but refrigeration keeps the fudge firmer.
This fudge does not need reheating.
Serve it chilled or let it sit at room temperature for a few minutes before serving if you prefer a softer bite.
Make-Ahead Tips
Butterfinger Fudge is a great make-ahead dessert.
You can prepare it 1–2 days before serving and keep it covered in the refrigerator.
For gifting, slice the fudge once firm and place pieces in small treat boxes, candy bags, or dessert tins.
Keep it chilled until ready to share.
Why This Recipe Works
This recipe works because sweetened condensed milk creates a creamy, smooth fudge base without complicated candy-making steps.
The chocolate chips melt into a rich base, the butter adds softness, the vanilla adds flavor, and the crushed Butterfinger candy gives the fudge its signature crispy crunch. Chilling helps everything firm up into neat, sliceable squares.
The result is a rich, creamy, crunchy candy bar fudge that is easy to make and perfect for sharing.
This Butterfinger Fudge is sweet, creamy, crunchy, chocolatey, and perfect for holidays, dessert trays, bake sales, parties, or homemade candy gifts.