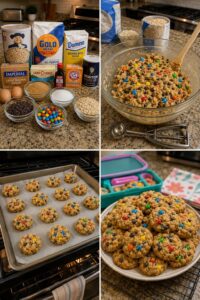
If you’re looking for a fun, colorful, kid-friendly cookie that is perfect for back-to-school season, these Lunchbox Monster Cookies are the perfect mini treat to make.
Made with oats, peanut butter, chocolate chips, colorful candy pieces, brown sugar, vanilla, and a soft chewy cookie dough, these cookies are sweet, playful, and easy to pack. They have the classic flavor of monster cookies, but made in a smaller lunchbox-friendly size that is perfect for kids, snack boxes, school treats, bake sales, after-school snacks, or weekend baking.
These cookies are soft in the center, lightly crisp around the edges, and loaded with colorful mix-ins. The oats give them a chewy texture, the peanut butter adds richness, the chocolate chips make them sweet, and the candy pieces give them that fun monster cookie look.
They are easy to make ahead, easy to store, and perfect for adding a small homemade treat to lunchboxes.
Why You’ll Love This Recipe
Mini lunchbox size
Perfect for back-to-school
Soft and chewy
Colorful and fun
Kid-friendly
Great for snack boxes
Easy to make ahead
Loaded with chocolate
Peanut butter flavor
Oats add chewy texture
Great for bake sales
Perfect after-school snack
Simple ingredients
Freezer-friendly
Always a fun treat
Ingredients You’ll Need
Old-fashioned oats
All-purpose flour
Peanut butter
Butter, softened
Brown sugar
Granulated sugar
Egg
Vanilla extract
Baking soda
Salt
Mini chocolate chips
Colorful candy pieces
Optional Add-Ins
Mini M&M-style candies
White chocolate chips
Peanut butter chips
Butterscotch chips
Chopped peanuts
Sprinkles
Raisins
Pretzel pieces
Toffee bits
Shredded coconut
Cinnamon
Honey roasted peanuts
Mini marshmallow bits
Chopped chocolate
Sea salt flakes
How to Make Lunchbox Monster Cookies
Step 1: Preheat the Oven
Preheat your oven to 350°F / 175°C.
Line a baking sheet with parchment paper.
Parchment paper helps the cookies bake evenly and keeps them from sticking to the pan.
Step 2: Cream the Butter and Sugars
In a large mixing bowl, add softened butter, brown sugar, and granulated sugar.
Beat until the mixture looks light, creamy, and smooth.
Brown sugar helps keep the cookies soft and chewy, while granulated sugar helps the edges bake nicely.
Step 3: Add Peanut Butter
Add peanut butter to the butter and sugar mixture.
Mix until smooth and fully combined.
Creamy peanut butter gives the cookies a soft texture and rich flavor.
You can use crunchy peanut butter if you want extra texture.
Step 4: Add Egg and Vanilla
Add the egg and vanilla extract.
Mix until the dough base becomes smooth.
The egg helps bind the cookies, and vanilla adds warm sweetness.
Scrape the sides of the bowl if needed so everything mixes evenly.
Step 5: Mix the Dry Ingredients
In a separate bowl, whisk together flour, baking soda, salt, and oats.
The flour gives the cookies structure, the baking soda helps them spread slightly, and the oats create that classic chewy monster cookie texture.
Step 6: Combine Wet and Dry Ingredients
Add the dry ingredients to the wet mixture.
Mix gently until a soft cookie dough forms.
Do not overmix, because overmixing can make the cookies tougher.
The dough should be thick, soft, and easy to scoop.
Step 7: Add Chocolate Chips and Candy
Fold in mini chocolate chips and colorful candy pieces.
Use mini mix-ins for lunchbox cookies because they spread more evenly through small cookies.
Save a few candy pieces to press on top before baking if you want the cookies to look extra colorful.
Step 8: Scoop Mini Cookies
Scoop small portions of dough onto the prepared baking sheet.
Use about 1 tablespoon of dough per cookie for a mini lunchbox size.
Leave a little space between each cookie so they can spread slightly.
Step 9: Add Extra Toppings
Press a few extra candy pieces or mini chocolate chips on top of each dough ball.
This makes the cookies look bright, fun, and bakery-style.
Do not press too hard; just place them gently on the surface.
Step 10: Bake
Bake for 8–10 minutes, or until the edges are lightly set and the centers still look soft.
Mini cookies bake quickly, so watch them carefully.
The cookies will continue to firm up as they cool.
Step 11: Cool on the Baking Sheet
Let the cookies cool on the baking sheet for 5 minutes.
This helps them set without breaking.
They may look soft at first, but they will become chewy as they cool.
Step 12: Move to a Cooling Rack
Transfer the cookies to a cooling rack.
Let them cool completely before packing into lunchboxes or snack containers.
Cooling fully helps keep them from becoming too soft in storage.
Step 13: Pack for Lunchboxes
Place 1–2 mini cookies in a small lunchbox container or snack bag.
They are perfect beside fruit, yogurt, sandwiches, or school snacks.
For the best texture, pack them after they are completely cool.
Serving Ideas
Lunchbox Monster Cookies are perfect for:
Back-to-school treats
Lunchboxes
After-school snacks
Bake sales
Kids’ parties
Birthday snack trays
Weekend baking
Cookie jars
Picnic treats
Snack boxes
School events
Road trip snacks
Family dessert nights
Mini cookie platters
Teacher appreciation treats
What to Serve With Them
These mini cookies pair perfectly with:
Milk
Chocolate milk
Hot chocolate
Iced coffee
Fruit cups
Apple slices
Bananas
Yogurt
Trail mix
Lunch sandwiches
Cheese sticks
Smoothies
Vanilla ice cream
Pudding cups
Fresh berries
Frequently Asked Questions
Can I make these cookies smaller?
Yes. These cookies are meant to be mini.
Use about 1 tablespoon of dough per cookie for a lunchbox-friendly size.
Can I use quick oats?
Yes. Quick oats can work, but the texture will be softer and less chewy.
Old-fashioned oats give the best classic monster cookie texture.
Can I use natural peanut butter?
You can, but traditional creamy peanut butter usually gives the best texture.
Natural peanut butter can make the dough oilier or drier depending on the brand.
Can I make these nut-free?
Yes. Use sunflower seed butter or another school-safe spread if needed.
Also check the chocolate chips and candy pieces to make sure they fit your lunchbox needs.
Can I use different candy?
Yes. Use mini candy-coated chocolates, chocolate chips, peanut butter chips, white chocolate chips, or sprinkles.
Small mix-ins work best for mini cookies.
Can I freeze the dough?
Yes. Scoop the dough into small balls and freeze on a tray.
Once frozen, transfer to a freezer bag and bake when needed.
Add 1–2 extra minutes to the baking time if baking from frozen.
Can I freeze baked cookies?
Yes. Let the cookies cool completely, then freeze in an airtight container.
Thaw at room temperature before packing.
Why are my cookies dry?
They may have been overbaked or too much flour may have been added.
Bake only until the edges are set and the centers still look soft.
Why did my cookies spread too much?
The butter may have been too soft, or the dough may have been warm.
Chill the dough for 15–20 minutes if needed before baking.
Can I make these ahead for the week?
Yes. These cookies are great for make-ahead lunchbox treats.
Store them in an airtight container and pack as needed.
20 Detailed Tips for the Best Lunchbox Monster Cookies
⭐ Use mini chocolate chips for better bite-sized texture.
⭐ Use colorful candies for a fun back-to-school look.
⭐ Use old-fashioned oats for chewiness.
⭐ Do not overmix the dough.
⭐ Use softened butter, not melted butter.
⭐ Cream the butter and sugars until smooth.
⭐ Add peanut butter for rich flavor.
⭐ Chill the dough if it feels too soft.
⭐ Scoop small cookies for lunchbox portions.
⭐ Press extra candies on top before baking.
⭐ Bake only until the edges are set.
⭐ Do not overbake mini cookies.
⭐ Let cookies cool on the baking sheet first.
⭐ Cool completely before packing.
⭐ Store in airtight containers to keep soft.
⭐ Freeze extra cookies for busy weeks.
⭐ Use sunflower seed butter for a nut-free option.
⭐ Add sprinkles for extra color.
⭐ Pack cookies in small snack bags.
⭐ Make extra because these are perfect for school weeks.
Fun Variations
Chocolate Chip Monster Cookies
Use only mini chocolate chips and skip the candy pieces.
This version is simple, classic, and easy for everyday lunchboxes.
Rainbow Monster Cookies
Add colorful candy pieces and sprinkles.
This version is bright, fun, and perfect for kids’ parties or school treats.
Peanut Butter Chip Monster Cookies
Add peanut butter chips with the chocolate chips.
This version has extra peanut butter flavor and a sweet, creamy bite.
Pretzel Monster Cookies
Add crushed pretzel pieces to the dough.
This gives the cookies a sweet and salty crunch.
White Chocolate Monster Cookies
Add white chocolate chips and colorful candies.
This version is extra sweet and pretty for dessert trays.
Oatmeal Raisin Monster Cookies
Add raisins and a little cinnamon.
This version has a cozy oatmeal cookie flavor with monster cookie texture.
Storage Tips
Store Lunchbox Monster Cookies in an airtight container at room temperature for up to 5 days.
Keep them in a cool, dry place so they stay soft and chewy.
For lunchboxes, pack cookies in small containers or snack bags after they are fully cooled.
You can also freeze baked cookies for longer storage.
Place parchment paper between layers if stacking them.
Make-Ahead Tips
You can make the dough ahead of time and refrigerate it for up to 2 days.
You can also scoop the dough into mini cookie balls and freeze them.
For busy school weeks, bake a batch on Sunday and store them in lunchbox-size portions.
This makes it easy to grab a small treat when packing lunches in the morning.
Why This Recipe Works
This recipe works because it combines chewy oats, creamy peanut butter, soft cookie dough, chocolate chips, and colorful candies into one fun mini cookie.
The oats give texture, the peanut butter adds richness, the brown sugar keeps the cookies soft, and the mini mix-ins make every cookie colorful and sweet. The smaller size makes them easy to pack, easy to serve, and perfect for back-to-school snack boxes.
The result is a soft, chewy, colorful cookie that feels fun, homemade, and lunchbox-ready.
These Lunchbox Monster Cookies are mini, chewy, colorful, and perfect for back-to-school treats, snack boxes, bake sales, after-school snacks, or family cookie jars.